
Anyone who has self-published a book or any kind of publication that includes the use of photographs within the pages should know about the different ways that photos can influence the printing process. While pictures can add remarkable character, interest and valuable content to just about any publication, including photographs also influences the book layout.
If you are considering self-publishing, being familiar with terms like printing bleeds, full bleed, and gutter margins will simplify the process of including photos in your book and will help to ensure that your final product looks fantastic. So what do these terms mean and how do they impact printing?
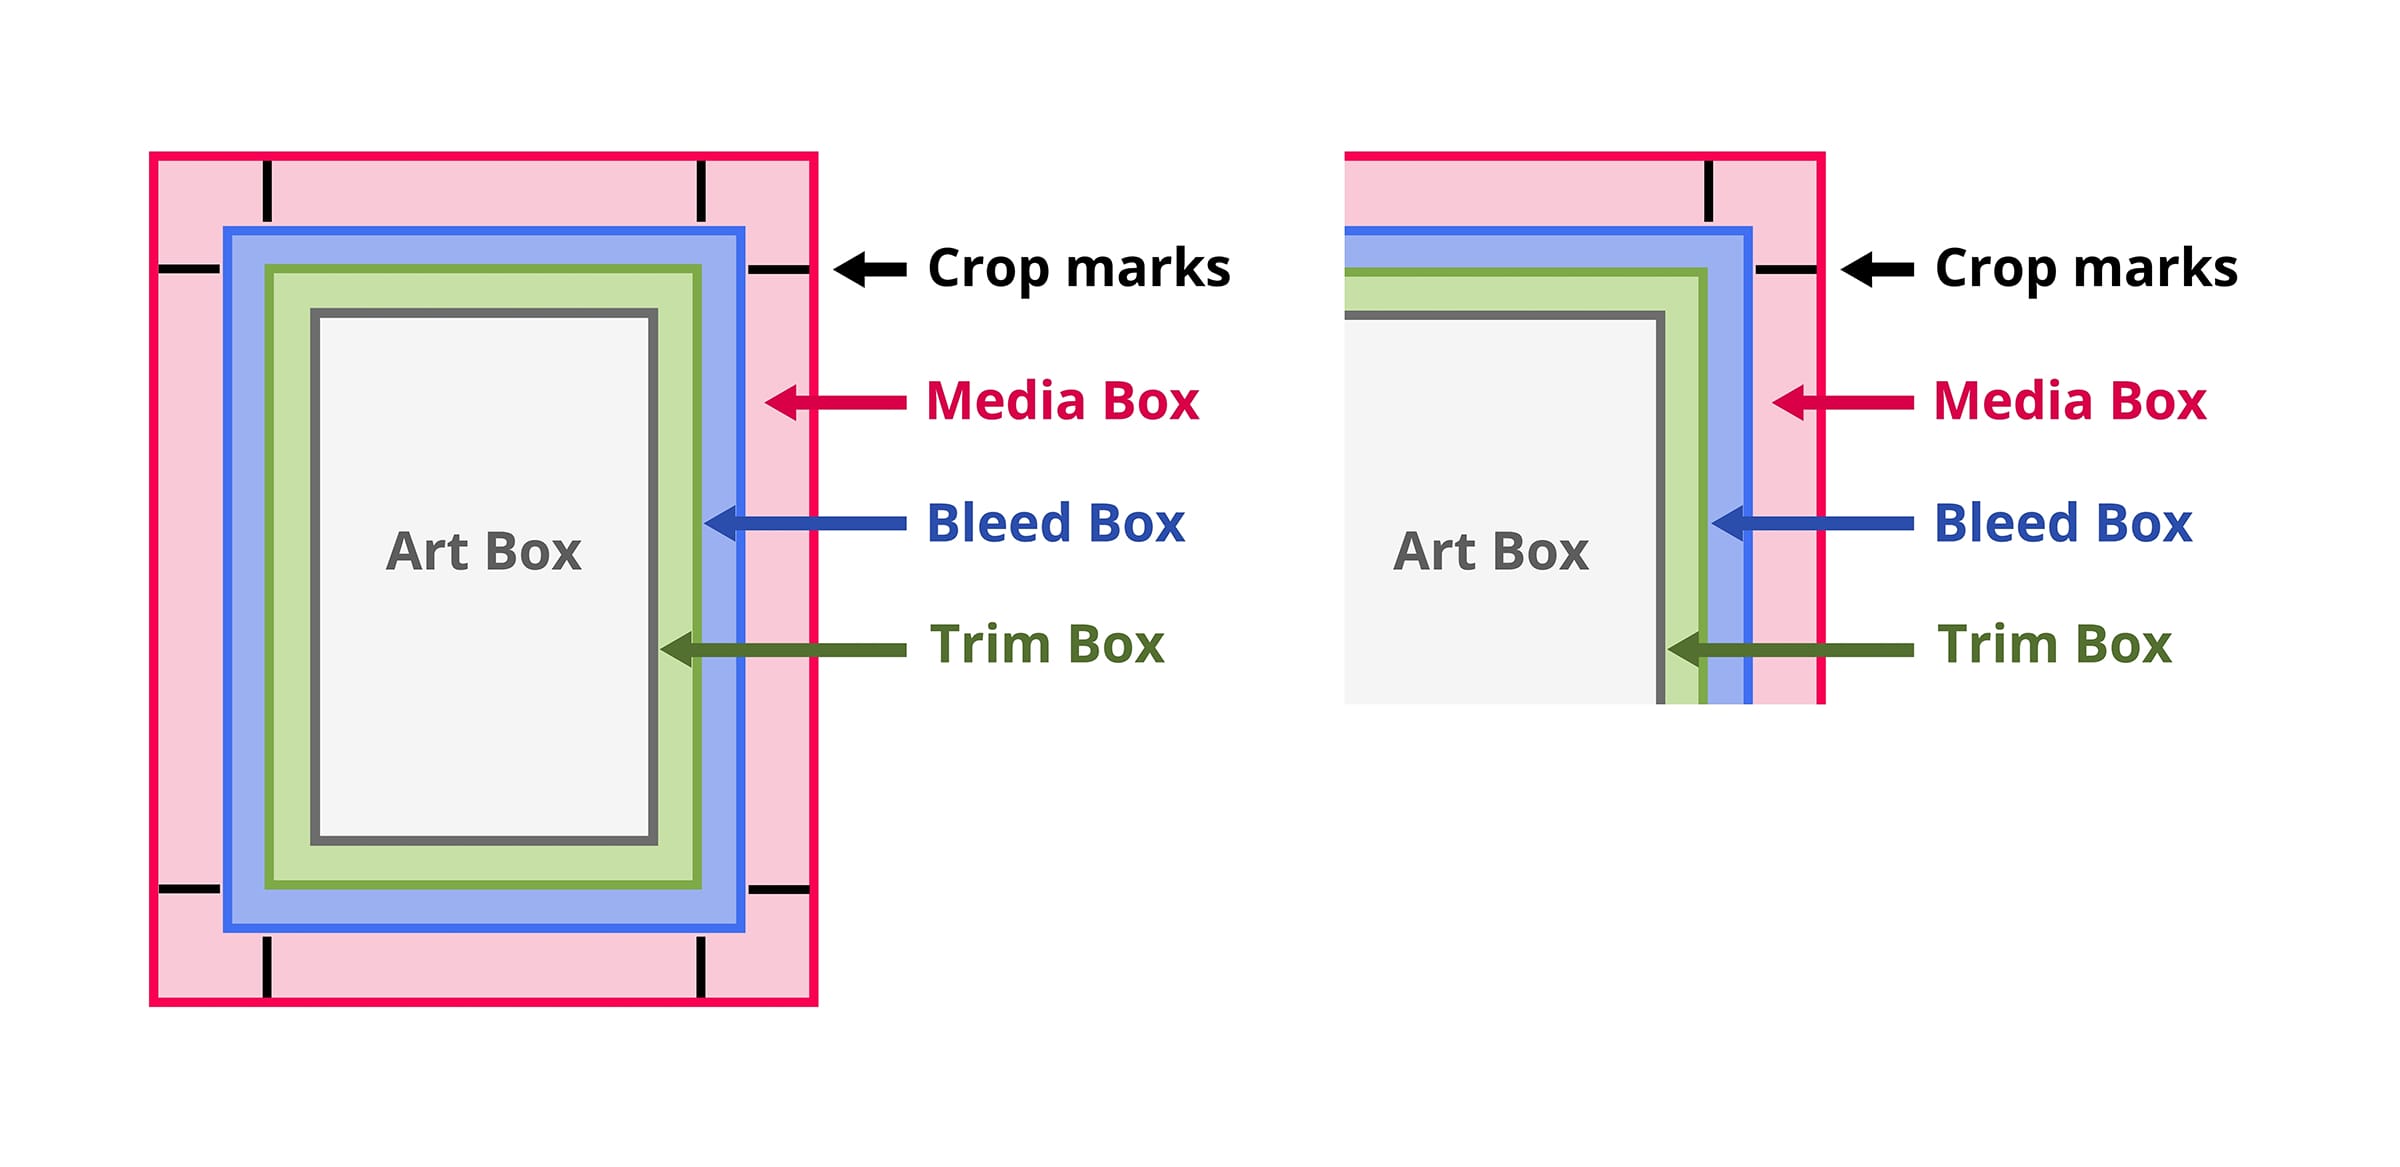
The Basics of Printing Bleeds
When preparing a page to include photographs, the printers must take the margin area surrounding the photo into consideration. These are the terms to describe what that area looks like in relation to the rest of the page including any photographs or graphics.
Printing Bleeds
What is it? Printing bleeds is the edge of the page that is trimmed off during the binding process. When a publisher prints a page for any sort of publication, a slightly larger size is printed than the final product dimensions. The difference between the final product and the printed size is called printing bleeds regardless of what is on the page. Once the printing is finished, the extra sliver is trimmed off to create a uniform page edging.
Why are printing bleeds necessary? When a book is being prepared for print, the printer stacks up multiple sheets of paper. Sometimes a large sheet will be used to print multiple pages and then once printed it will be cut down to size. Other times a stack of paper is used for printing single pages but they are still compacted together during the printing process.
In both situations, the stacked pages may move a small fraction, which is normal. The printing bleeds allow for this tiny movement without affecting the contents of the page. Also, cutters cannot cut exactly on the edge of the page, so printing bleeds ensure that no white shows on the edge of the page.
Should a page with a picture build in printing bleeds? Pictures that are intended to have white space around them do not need a bleed built into the picture itself but the margins around it should account for the bleed (called a “full bleed.”) Pictures that are intended to reach the edge of the page should have printing bleeds built in to avoid cropping out the edge(s) of the photograph.
How does not having any printing bleeds affect a page? Pictures that are printed without bleed will be affected in two ways. First, the final printed page of the book will not have any white space surrounding the picture and the photo will extend to the trimmed edge. But the second effect is that the edges of a photograph will be trimmed off when the publisher cleans up the edges of the book during the binding process.
This means that not having any printing bleeds on a page’s layout will result in losing some of a photograph on the page. Critical aspects of the picture may be lost or the overall view of the photo may be skewed when the page is trimmed off to straighten up the final book’s pages.
Setting Up Printing Bleeds
Setting up a full bleed page allows for a thin margin of error within a book’s printing, so all formatting for bound books should be created using the full bleed method. For all writers who are considering self publishing, using a template is a good way to make sure that your book’s format considers a full bleed structure. Some word processing programs like Microsoft Office even offer a novel template.
But some writers will inevitably need to understand how to format their own margins for full bleed printing margins so let’s look at how that can be done manually without the use of a template.
1 In the settings of the word processing program used for writing, go to File>Page Settings.
2 Determine the final page size needed for the book once trimmed to specifications.
3 Set up a margin that is .25 inches larger than the final page size needed.
4 Label that Page Setting with a custom name (“Full Bleed for book 123×123”) to use again if desired.
5 Next, open up the Format>Document>Margin settings.
6 Create a custom margin that includes the full bleed settings (if the margin is usually .5, set it for .75) and then create a custom name (“Full Bleed margins for book 123×123”) to reuse.
Once these settings are used, any file created with them will be set up as full bleed printing.
Inside Margins: The Gutter
The last aspect to consider when using full bleed design is to account for the inside margins of a page called the gutter area. The gutter is the place where a bound book joins together and books that are bound correctly will not have print or graphics disappear into this area. Instead, the space should have a visually similar margin to the reader.
But in order to not “lose” part of the printed page in the gutter, pages must also be given an additional gutter margin allowance of .2 or .3 extra to account for the page to sink down into the binding.
- When using a template or page layout software, the gutter can be predetermined or already included in the formatting.
- To use a word processing program set up a gutter allowance by going to Page Set Up> Layouts>Margins>Custom Margins>Gutter.
- When manually creating a gutter without a template, gutter allowance has to be added on the inside of each page only. This is time-consuming and should only be done once 100% of all editing and revising is complete and before adding page numbers as this small movement will inevitably result in some page changes at the end of a longer text.
- For two-page spread photos or graphics, the gutter area is used to maintain the look of the single image across both pages. In order to accomplish a seamless two-page spread, the gutters of both pages should be increased by .125 each. This means that both pages will include a small sliver of the other page’s photo but this sliver will be sliced off in the bookbinding process to reveal one complete, singular picture that flows together in the gutter area.
Getting Started
When self-publishing, thinking about margins, full bleed design and gutters may not be at the top of your author’s list of things to master before drafting your masterpiece. But these logistical aspects of writing and formatting are critical parts in ensuring that a final self-published book appears professionally printed and bound.
So learning a little bit about the printing process and full bleed is important to make sure that your written masterpiece arrives at the printer in the correct formatting to show off your writing skills. Are you ready to self-publish? Dazzle Printing makes it simple for you to take your completed document and turn it into a beautifully printed book quickly.


